How to Take a One-Click Image using iTelescope
From PMU199L0111
Making a One-Click observation with iTelescope is fairly easy. The one-click image interface abstracts away a lot of the complexity of the iTelescope system. It sets you up with some default parameters and gets you an image quickly.
Here are the steps you need to follow.
- Log into the iTelescope web site, using the username and password provided to you. After you log in, you should see the Launchpad:
-
- Click on the text beside the name of a telescope. When I took the above screenshot, all of the telescopes were closed. Still, you can click on the phrase "Closed: Day Time" beside the name of any telescope to see how the interface looks. When the telescopes are open, this text will change. For more information, see the Get Started with iTelescope page.
- Now you should see the observing interface for the telescope you clicked on (T24 in this example):
-
- In the menu on the left, click on "One Click Image" under "Basic Imaging". Now you should see the one-click page for that telescope:
-
- Scroll down that page. You should see one or more tables of objects that you can observe. It will look something like this:
-
- The system is abstracting away a lot of the details for you. It's showing you all of the really nice objects that happen to be visible to the telescope you've clicked on at the time you've clicked on it. The selection of objects will change hour by hour as the Earth rotates on its axis, bringing new objects into that telescope's view. The system has also set up the telescope in a very basic default mode. It's a lot like using a point-and-shoot camera: your camera (or your phone) decides what the best settings are and takes the image with one click of the shutter button. Astronomical images take a lot longer than a second to acquire. The objects are very dim, so the "shutter" has to stay open for a long time to collect enough light. We call this the "exposure time". For the one-click image interface, the exposure time is set to a default value of five minutes. This is a reasonable value for all of the bright objects that appear in the table. It might not give you a great image, but it should give you a half-decent one. Later, we will explore how to tweak the settings to get a better image of a particular object. For now, choosing object that looks interesting to you and press the "Submit" button.
- Once you've hit submit, you should get a message saying that you should go to the "System Status" page. To do that, scroll back up the page and either click on the "System Status" link in the text at the top of the page, or the "System Status" link in the menu on the left side, under "Toolbox". You should get a page like this:
-
- There is a lot of information on this screen--don't be too intimidated! Much of it is information you will never have to be concerned with. Basically, it is showing you the current status of the telescope. The "Observatory" column shows you the time at the observatory where the telescope is located: UTC is "universal time" which doesn't change with time zone; "Local" is the local time in the time zone where the observatory is located. The "Telescope" column shows you where on the sky the telescope is pointing. It is expressed in two different systems: right ascension and declination, which are a lot like latitude and longitude, and altitude and azimuth. You don't really need to worry about those numbers. The main thing you should pay attention to is the next column. The "Imager" column will show you what the telescope is currently doing. The field right below the word "Imager" will update constantly and probably blink as the telescope executes various actions required to take your image. When it gets to "Expose 300 sec", that means it is actually gathering light for your image. The 300 seconds refers to the five-minute duration of your exposure. You will see a little blue progress meter advance as your image is acquired. You can also follow along with the detailed readout of everything the telescope is doing in the text box below, labeled "Current Running Script Output." Again, don't worry about understanding every line of the readout. A lot of it is written in highly technical language that we don't expect you to understand. Just try to monitor what it is doing and see if you can spot any error messages. The whole process can take anywhere from about 10 minutes to about 20 minutes, depending on where the object you're observing is located on the sky.
- If everything goes well, the computer script that is running the telescope should finish and, in the readout window you should see a set of lines like this:
04:24:27 06:24:27   Image File Saved to T18-mikereid-M81-20140915-061847-Blue-BIN1-E-300-001.fit
04:24:29 06:24:29   Creating Preview Image
04:24:31 06:24:31   (autoguider stopped)
04:24:31 06:24:31   (turning tracking off for safety)
04:24:31 06:24:31   Parking-Telescope
04:24:31 06:24:31   The script has finished
04:24:31 06:24:31
04:24:31 06:24:31   ---> No Script is Running <---
- Congratulations! You just took your first astronomical image with iTelescope.net. You've just taken a picture of some faint, far-away part of the cosmos. Who knows what secrets your picture might reveal! If you haven't been able to get to the above-described stage, where the script finishes successfully and gives you the name of your image file, then e-mail pmu199@astro.utoronto.ca or post on the discussion boards on Portal and we'll try to help you. Make sure to do this early!
- Once you have successfully taken a one-click image, you need to download your file. iTelescope.net is very fussy and old-school about downloading files. When your script finishes, you will get an e-mail from support@itelescope.net which will include the output of the script and a preview copy of your image as an attachment. The preview image might not be very good (or it might be). Here's an example of a preview image from one of my one-click observations:
-
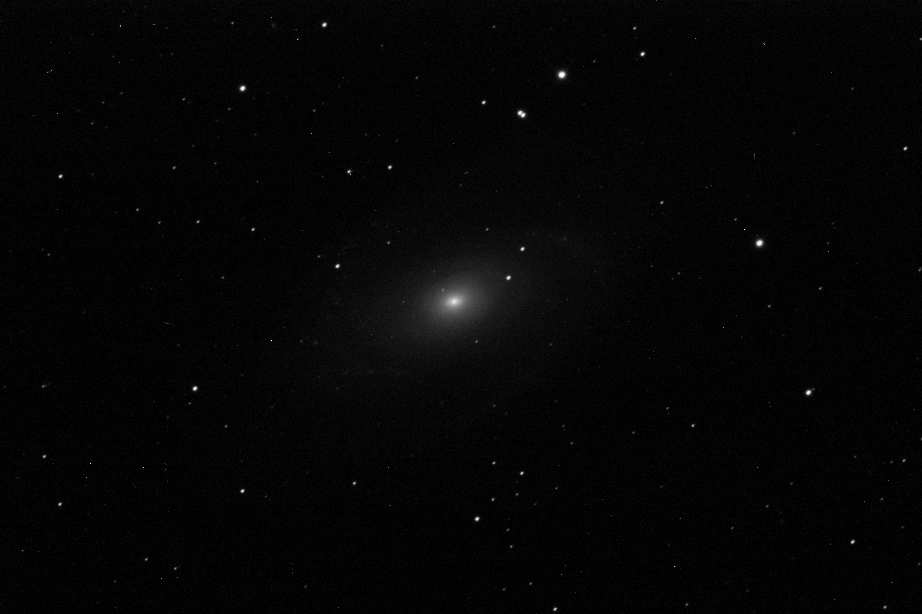
- Note that the image is in black and white. That's the default for one-click images. If your image doesn't look very good, you may want to download the raw data file and try to improve it yourself. For information on how to do that, see the Downloading Data from iTelescope and Nebulosity pages.
-


