Create 3-colour images
Before you create your 3-colour image, make sure that you have processed your raw telescope data appropriately! First you should Align and Combine your individual filters. Next, you should use digital development to bring out the details of your images. If you have completed these steps, then you are ready to make a 3-colour image!
Contents
Basic Steps
Follow the steps below to create your 3-colour image:
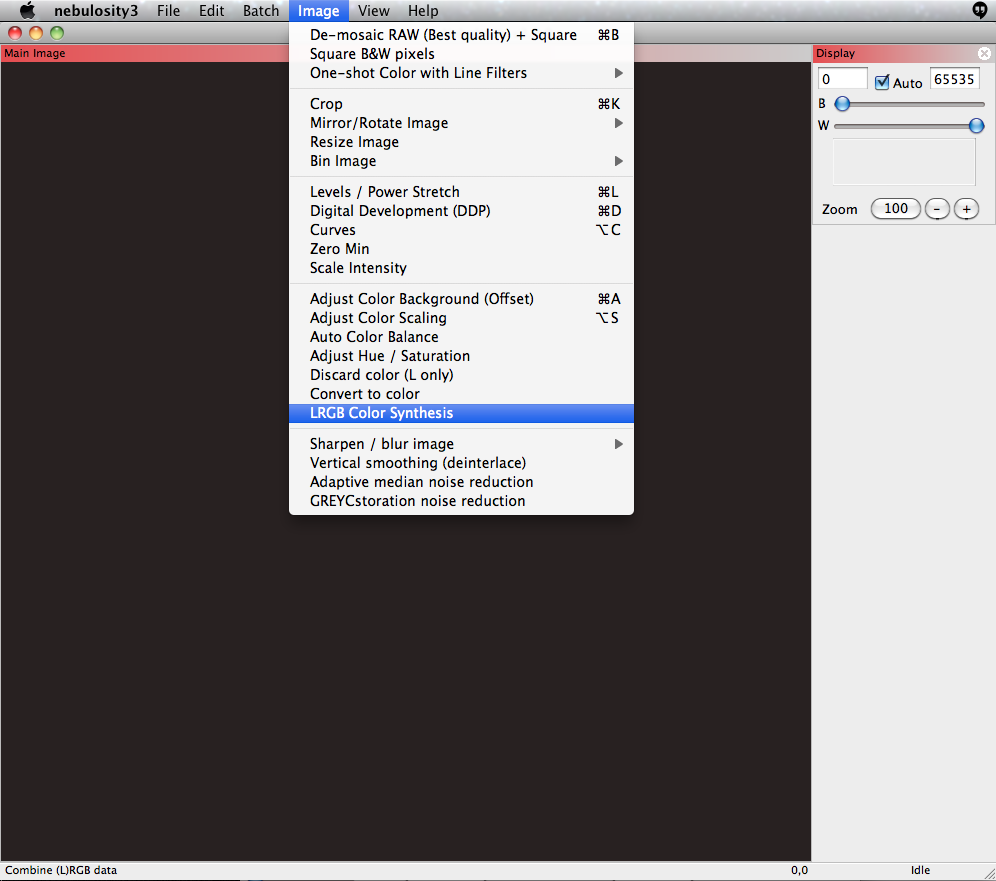
- Open the Image menu, then select LRGB Color Synthesis.
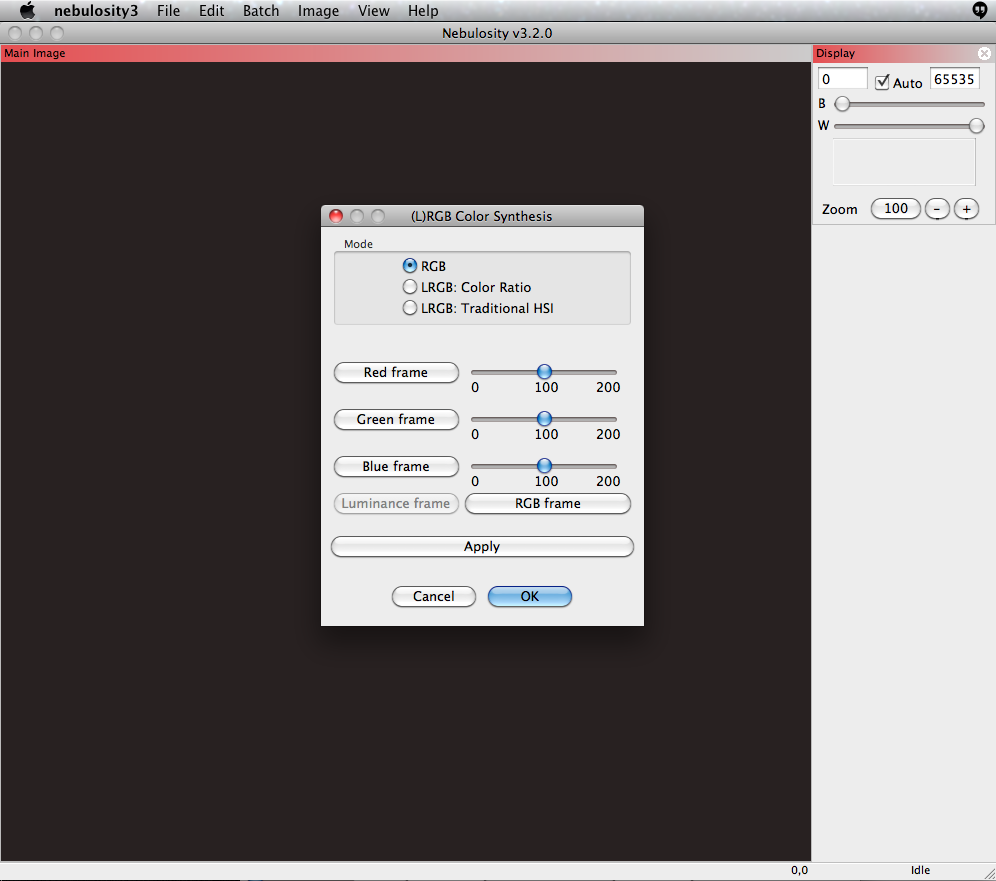
- The simplest mode is RGB. Use this if you have three colour frames, but do not have a luminance frame.
- If you do have a luminance frame, use LRGB: Color Ratio mode.
- Click on the "Red frame" button to load your red filter frame.
- Repeat with "Green frame" and "Blue frame".
- If you have a luminance frame, click on "Luminance frame" to load it.
- Click "Apply." You should see your combined (L)RGB image in the main window. Use the "Zoom" buttons on the right-hand menu to adjust the frame so that you can see your object of interest. Your image will likely not look the way you want it to yet. There is a good chance that it may be too green, for example.
- Use the sliders to adjust the relative amount colour in each of the filters. Sliding the "Green" slider from 100 to 75, for example, will decrease the amount of green in your image. Click "Apply" to see how increasing or decreasing the slider affects your frame. It is a good idea to adjust just one filter at a time.
- Once you are satisfied with the colours in your image, click "Apply" and then "OK."
IMPORTANT: Once you have clicked "OK", you CANNOT use the sliders to adjust the relative amounts of each colour. You may therefore wish to record what the values on each slider were in case you wish to recreate your image later.
Example
We will step through the above procedure using our R, V, and B filter images of NGC 1232. Recall that first, we aligned and stacked the raw telescope data. Then we digitally developed them to bring out the details of the galaxy. We now have three files:
dev_align_NGC1232_R_stack.fit
dev_align_NGC1232_V_stack.fit
dev_align_NGC1232_Blue_stack.fit
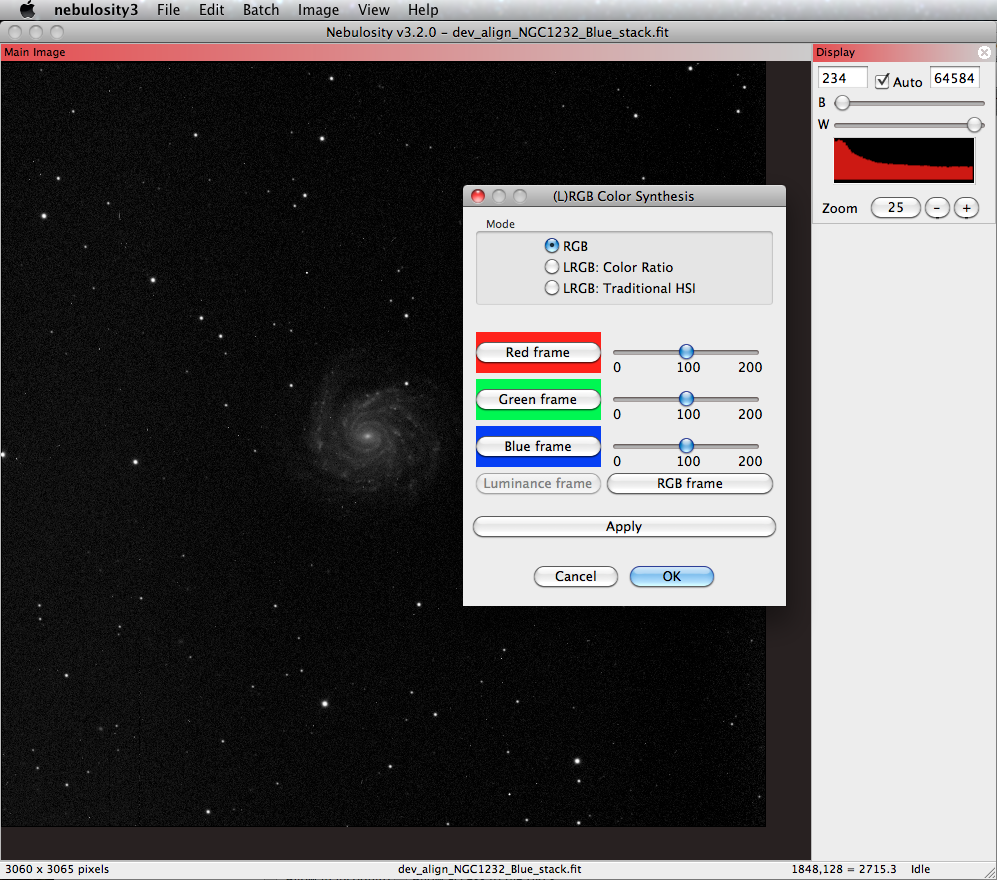
- Open the Image menu and select LRGB Color Synthesis:
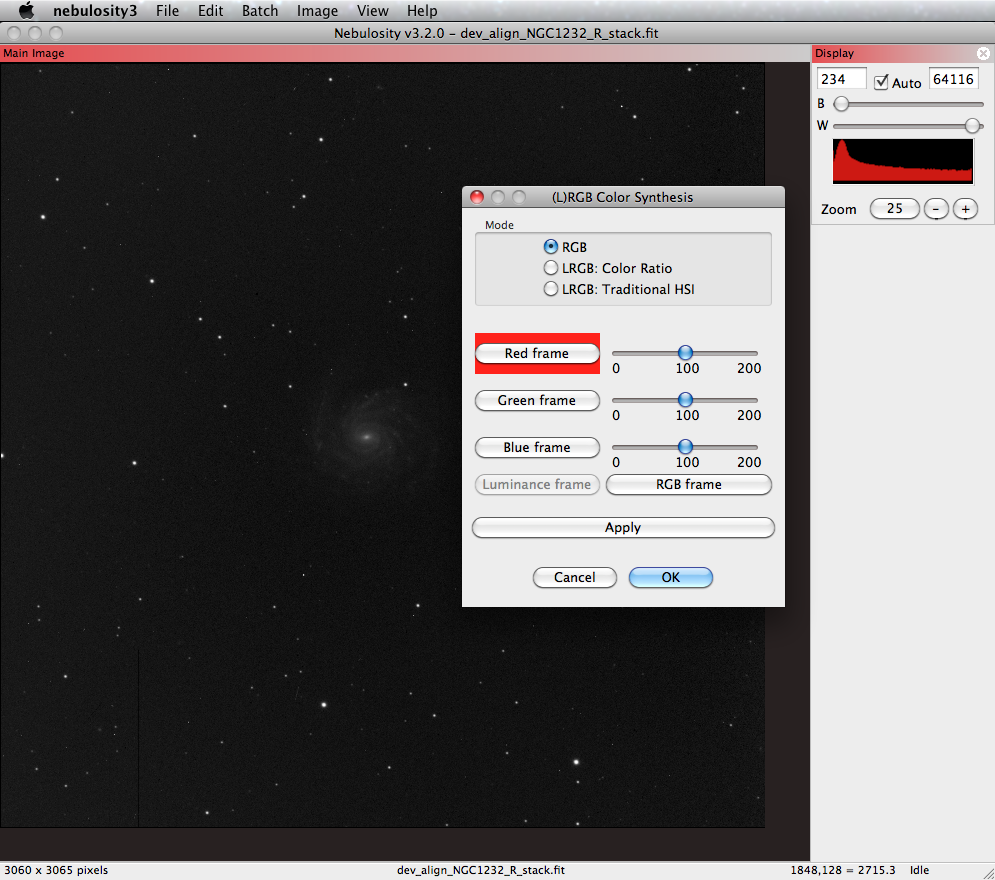
- Click on "Red frame" to load your red filter frame (in this case, dev_align_NGC1232_R_stack.fit). Once the file is loaded, the "Red frame" button will have a red background behind it.
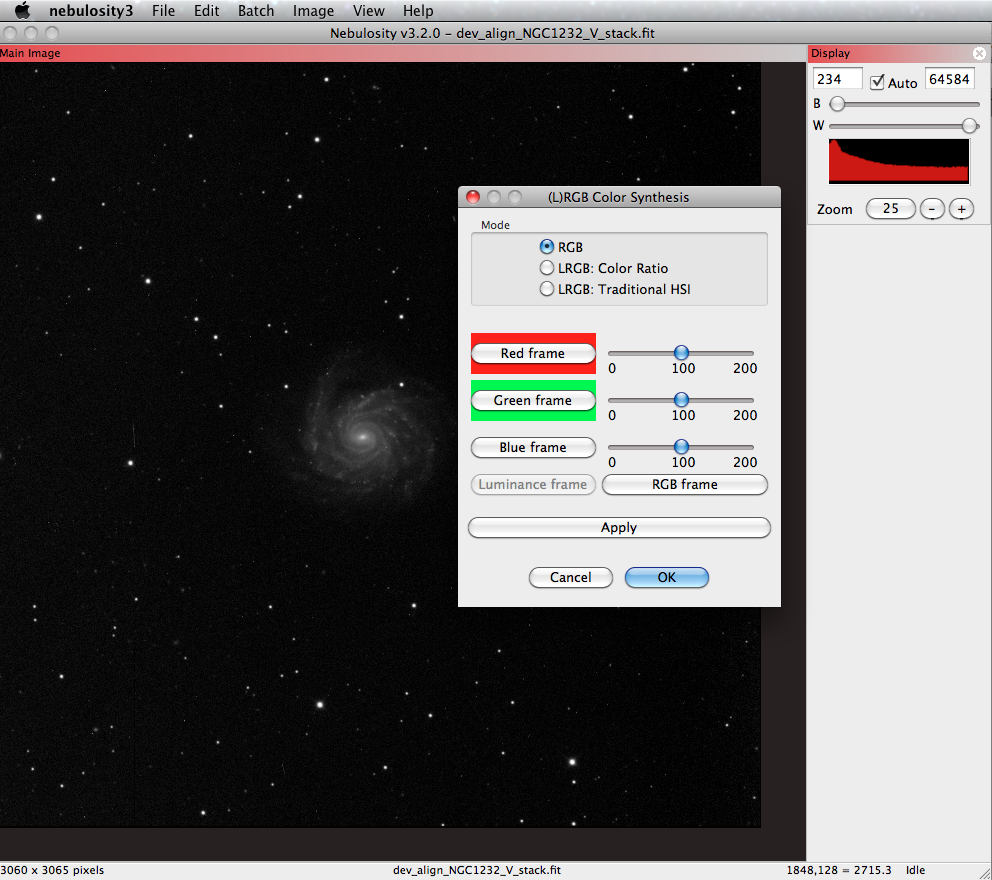
- Load the "Green frame" (dev_align_NGC1232_V_stack.fit) and "Blue frame" (dev_align_NGC1232_Blue_stack.fit).
- Click "Apply" to combine the filters. This is what Nebulosity shows for our images:
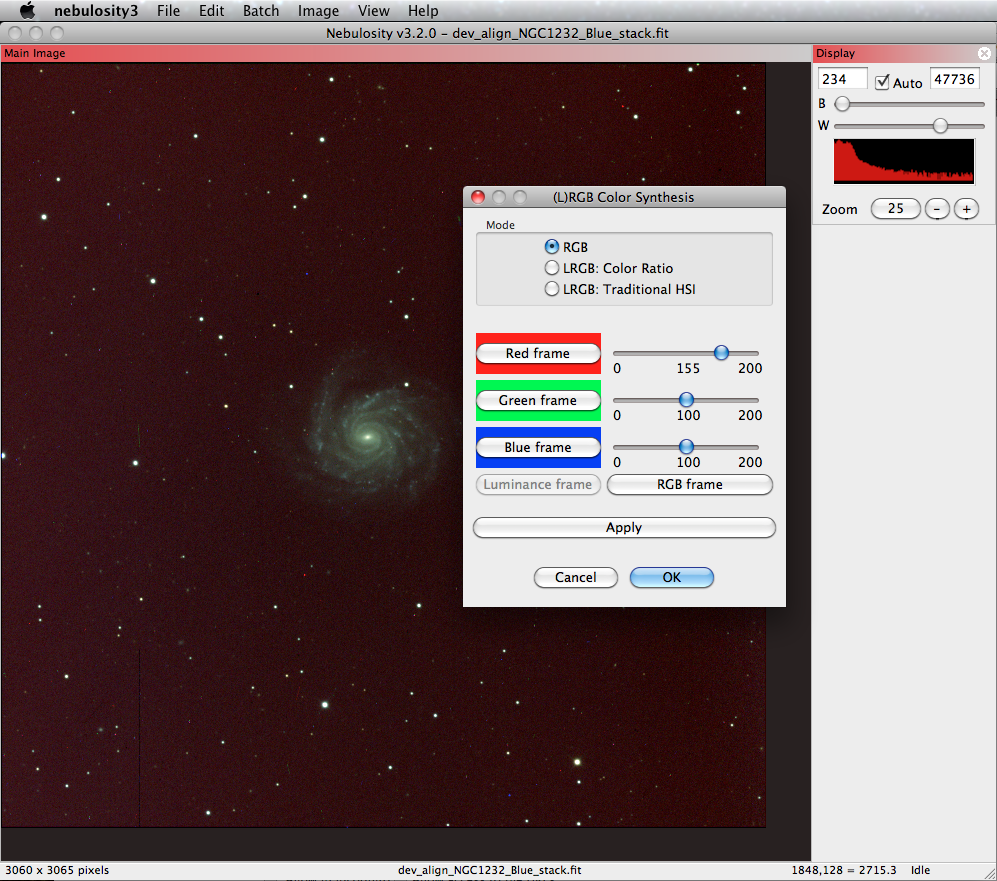
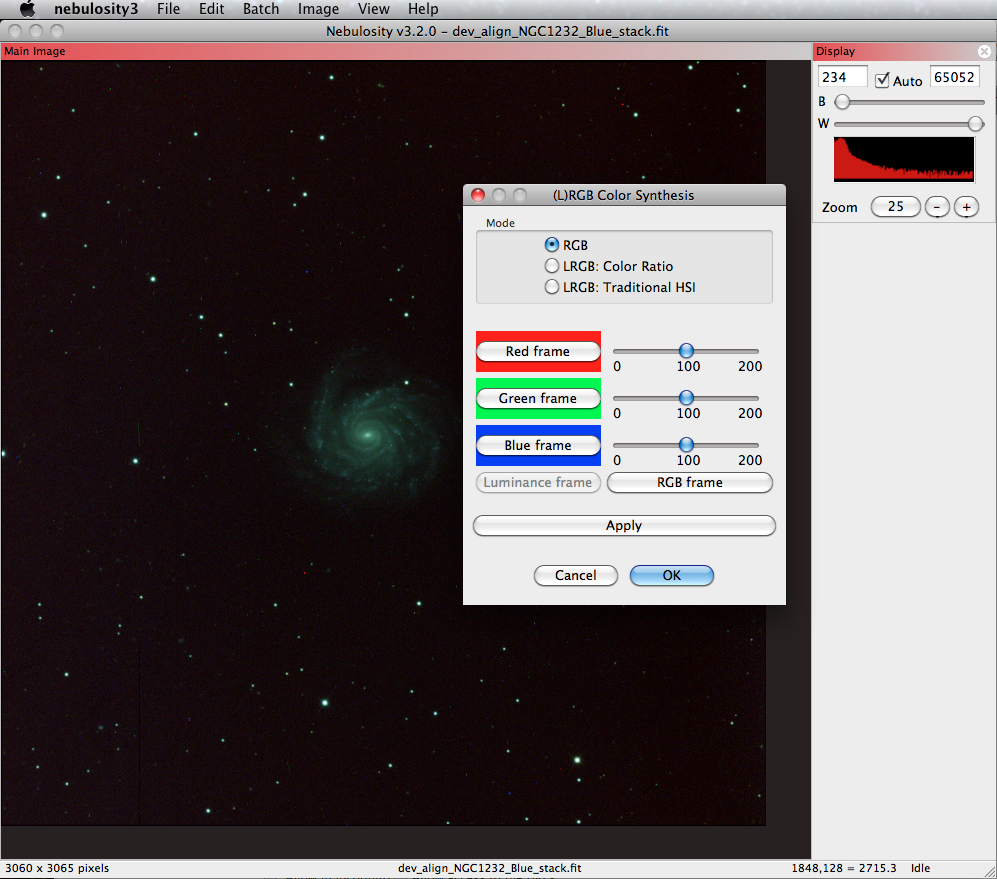 Note how green the image is. Recall that our green filter had the brightest details in the galaxy out of our three filters, and that our red filter had the dimmest details - it makes sense, then, that green would dominate our image.
- You can adjust the sliders to change the amount that each filter contributes to the image. Here, we boost the Red Frame to 155. Our galaxy still looks too green, however.
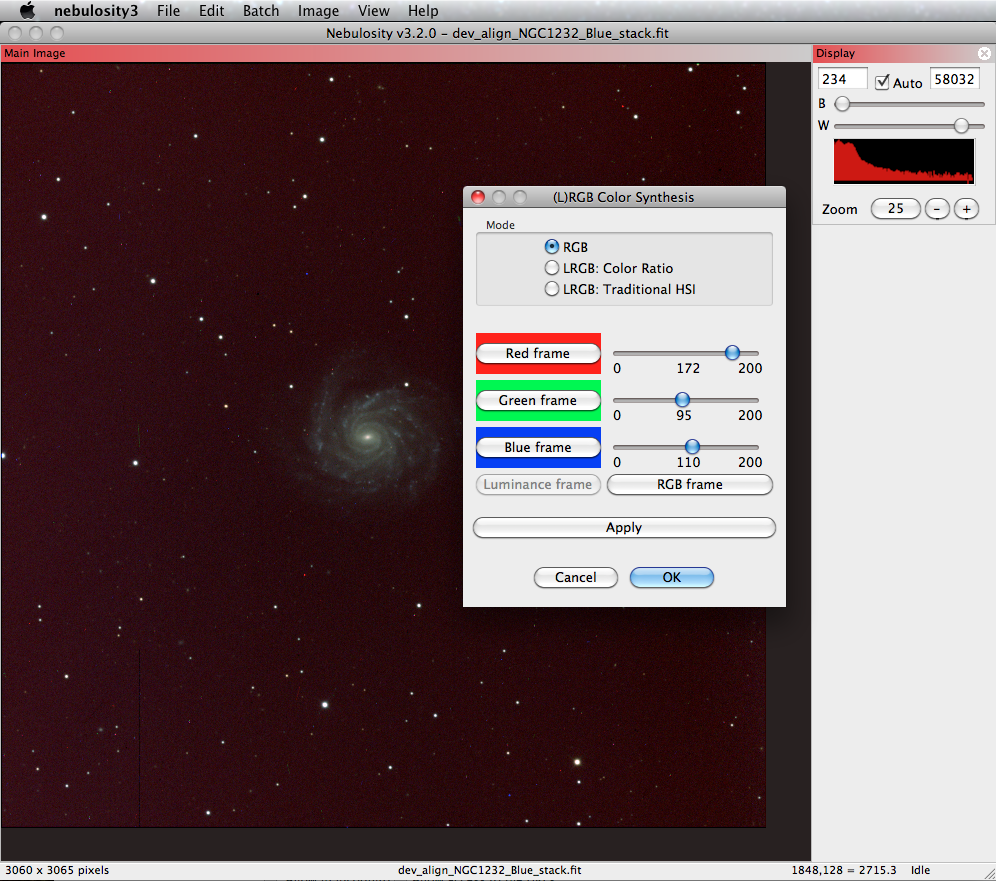
- Play around with the sliders until you have an image that is not dominated too much by one colour. If you have stars in your image, most of them should look fairly white, bluish white, or yellowish. Here, we have boosted the red to 172, brought the green down to 95, and boosted the blue to 110. Our background is now fairly red, but we can adjust that in the fine-tuning later.
- Click "OK" when you are finished. Be sure to save your new file. We now have our RGB file,
NGC1232_RGB.fit
Fine-Tuning Your Image
Adjust Color Background
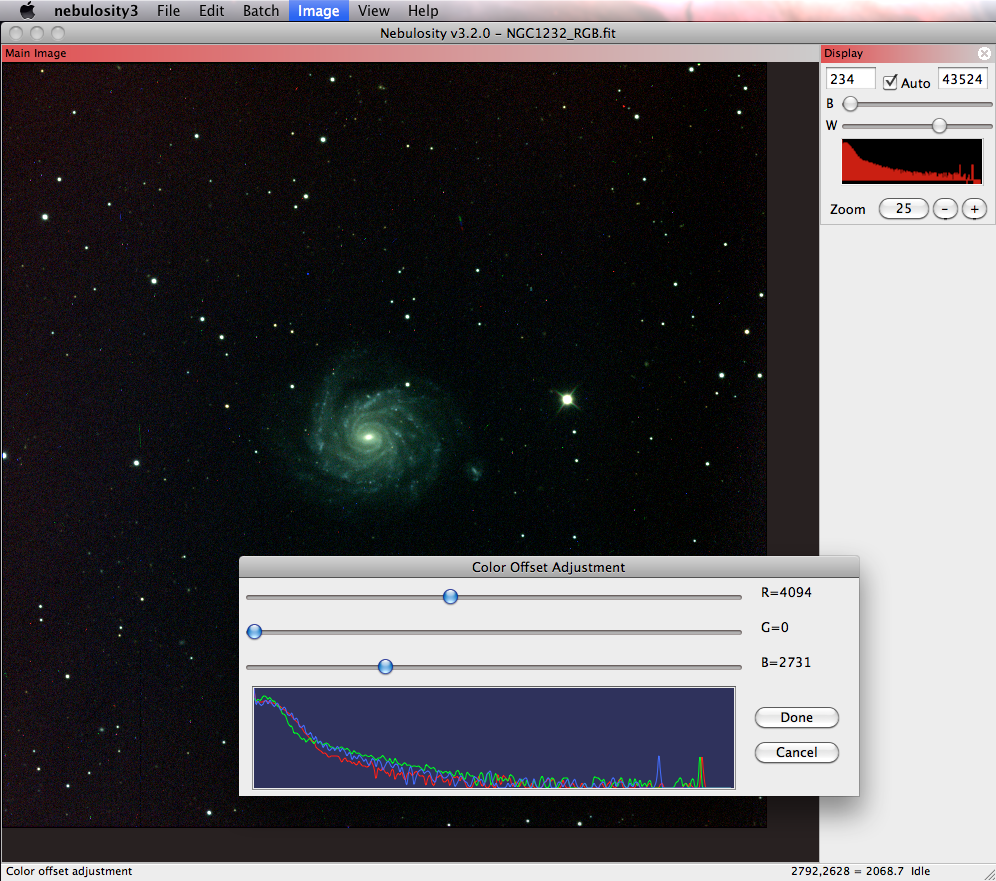
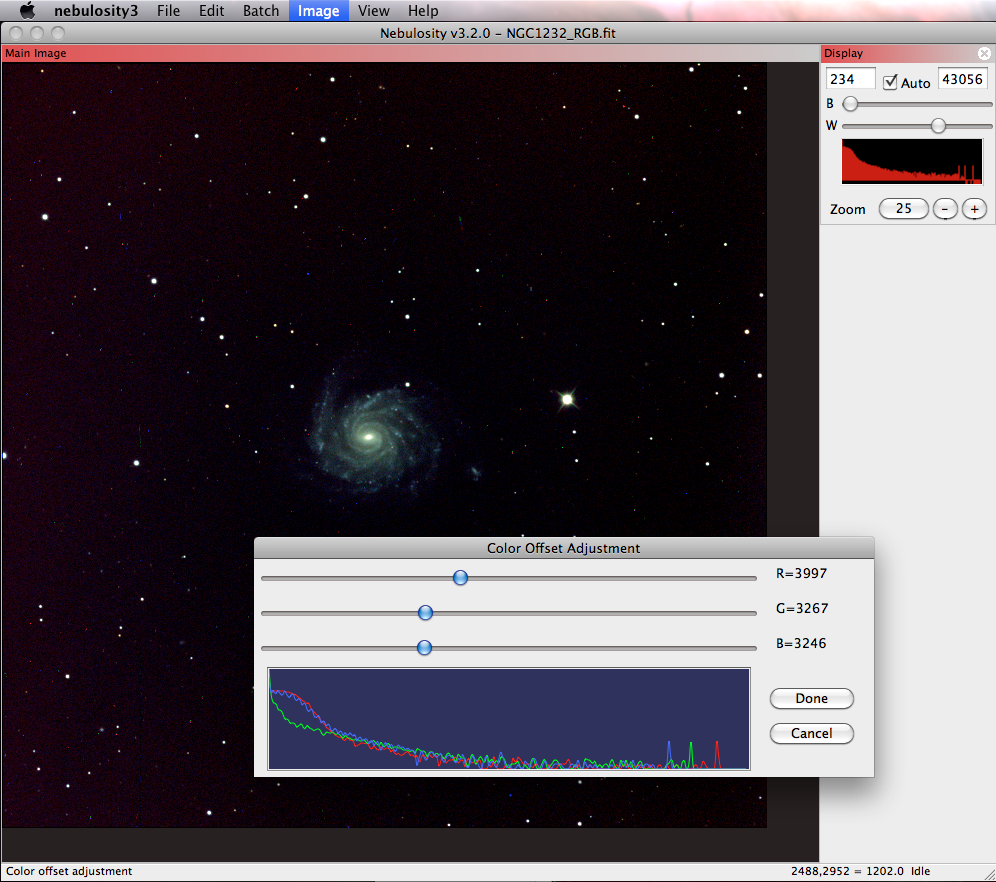
Even after adjusting the colour sliders in the LRGB Synthesis step, you may still have some colour in the background. In our case, there is a reddish cast in the background. To remove this, you can try adjusting the background colour. To do this, go to Image and then Adjust Color Background (Offset).
The tool will try to automatically adjust the levels of red, green, and blue to make the background nice and dark. This might have the effect of giving your object a colour cast instead. You can adjust the amount of offset for red, green, and blue by using the sliders. The image will update itself when you move the slider. When you are satisfied with your image, click "done". You can adjust the colour scaling in other ways later on, if you wish.
Levels and Power Stretch
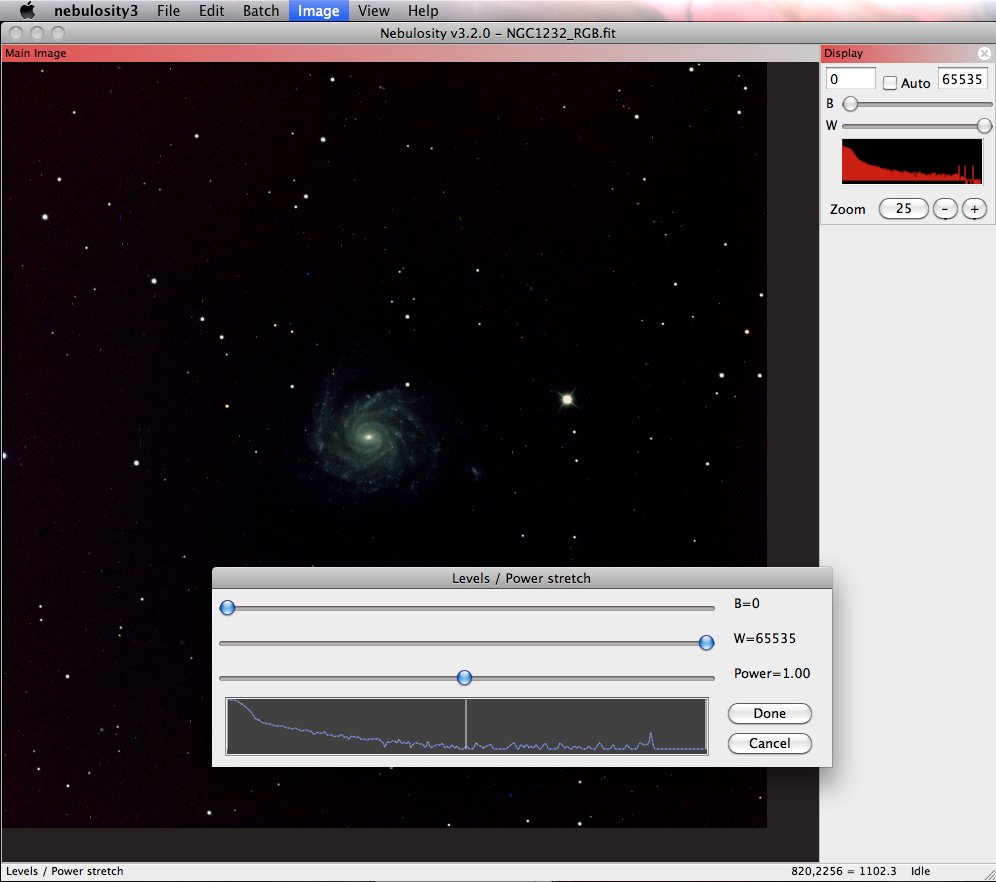
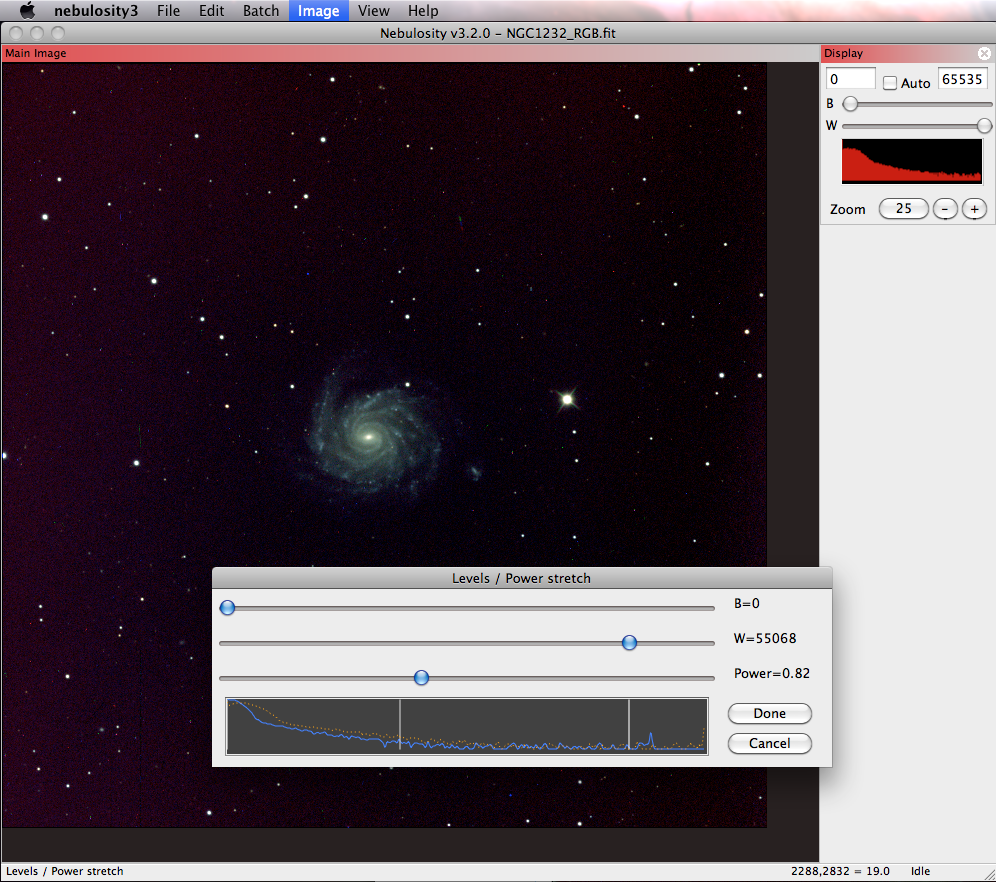
You can continue to bring out detail in your image by using the Levels/Power Stretch tool in the Image menu.
Adjust the sliders until you have an image that has a good amount of detail, but still has a nice black background.
Saving Your Result
When you're happy with your image, you can save it in the original file format by clicking File > Save Current File. For posting on the discussion board, you should also save a copy as a JPG by clicking File > Save JPG File as Displayed
