Align and Combine
From PMU199L0111
If you are working with data that you have taken from a telescope, you will likely need to stack and align your exposures before you can combine them into a 3-colour image. This section will step you through this process using images of NGC 1232 taken with iTelescope. These images, like the rest of the images you will acquire from iTelescope, are in the FITS format.
- We start with two exposures in each filter, R, V, and B:
R:
Calibrated-T27-NGC1232-20140929-041009-R-BIN1-300-001.fit
Calibrated-T27-NGC1232-20140929-041531-R-BIN1-300-002.fit
V:
Calibrated-T27-NGC1232-20140929-034741-V-BIN1-300-001.fit
Calibrated-T27-NGC1232-20140929-035307-V-BIN1-300-002.fit
B:
Calibrated-T27-NGC1232-20140929-035849-Blue-BIN1-300-001.fit
Calibrated-T27-NGC1232-20140929-040416-Blue-BIN1-300-002.fit
- First, we must combine the two exposures in each filter. To do this, open the "Batch" menu in Nebulosity and select "Align and Combine Images."
- Under "Output mode," select "Save stack" - this will ensure that the merged exposures are saved as a single image.
- Under "Alignment method," select "Translation + Rotation + Scale".
- Leave the rest of the options as the defaults.
- Select the two exposures in the R filter.
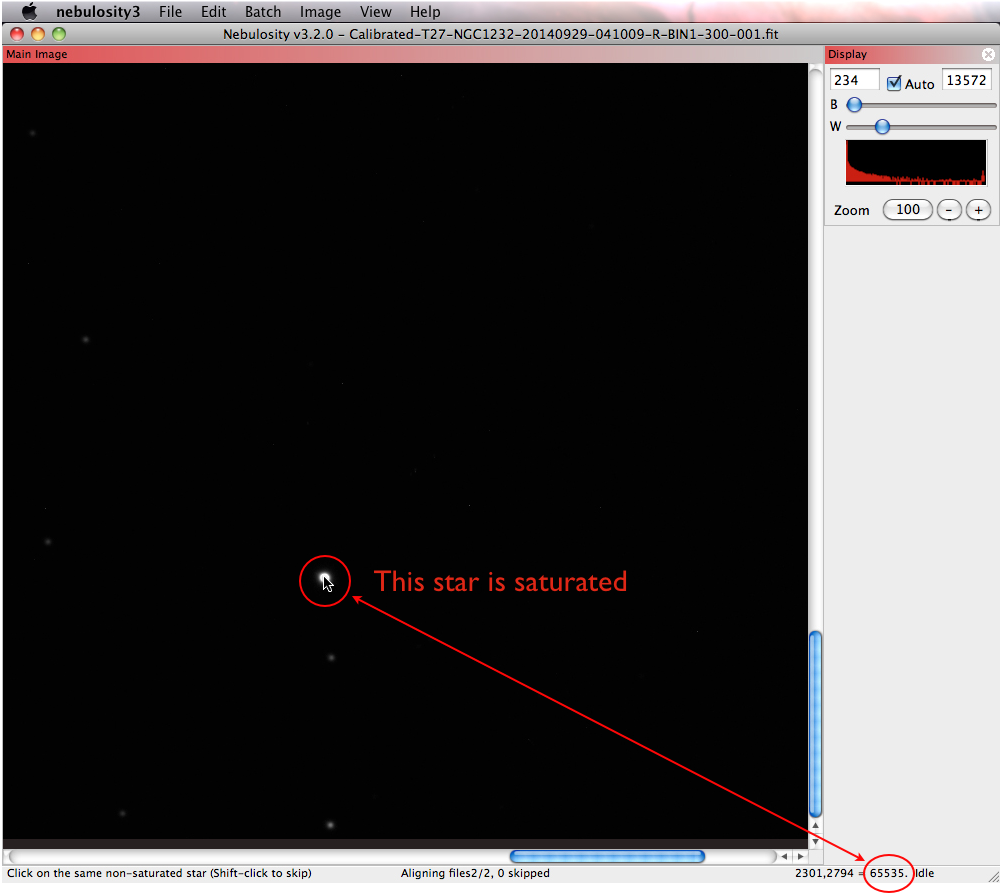
- The menu at the bottom left of the Nebulosity window will say "Click on the same non-saturated star (Shift-click to skip)".
- Find a star in your image and hover your mouse over it. A value of 65,535 in the lower right corner indicates that the star is saturated. Try to pick a star that has a value lower than this.
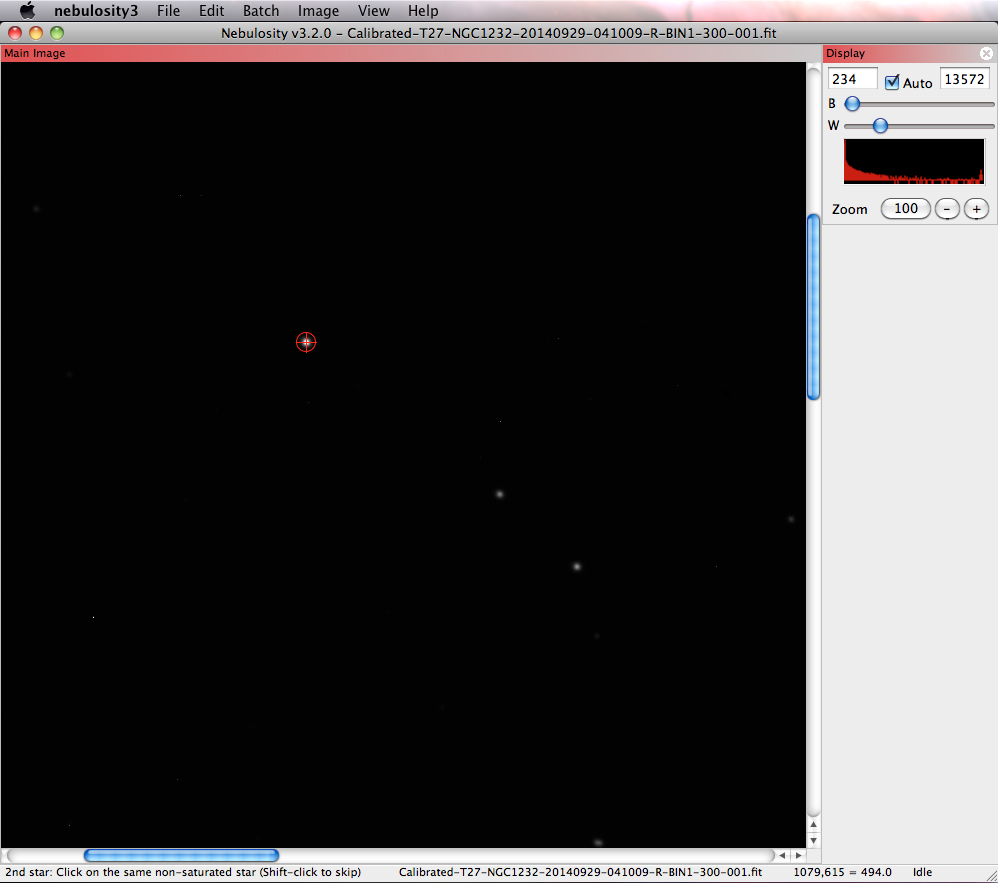
- Once you have found a suitable non-saturated star, click on it. A red circle will appear around the star. Click on the same star when indicated by the menu at the bottom of Nebulosity.
- Next, find a second star. You can achieve better accuracy by selecting a star that is far away from the first star you selected. You can scroll within your image, or zoom out if necessary. Click on this second star in the second frame when indicated by the menu at the bottom.
- You will now be prompted to save your aligned and combined image. Give it a suitable name. Here we chose the following filename:
NGC1232_R_stack.fit
- Repeat the steps above for the other filters (in this case, V and B). We now have three stacked files:
NGC1232_R_stack.fit
NGC1232_V_stack.fit
NGC1232_Blue_stack.fit


