Nebulosity
Contents
Installing Nebulosity
Download the appropriate file (Mac or Windows) from the Stark Labs Downloads page. After installing the software, input your registration code for full access.
Nebulosity comes with a very detailed User's Manual. However, most of the information you will require can be found on these pages.
Pre-processing
Align and Combine Filter Exposures
If you are working with data that you have taken from a telescope, you will likely need to stack and align your exposures before you can combine them into a 3-colour image. This section will step you through this process using images of NGC 1232 taken with iTelescope. These images, like the rest of the images you will acquire from iTelescope, are in the FITS format.
- We start with two exposures in each filter, R, V, and B:
R:
Calibrated-T27-NGC1232-20140929-041009-R-BIN1-300-001.fit
Calibrated-T27-NGC1232-20140929-041531-R-BIN1-300-002.fit
V:
Calibrated-T27-NGC1232-20140929-034741-V-BIN1-300-001.fit
Calibrated-T27-NGC1232-20140929-035307-V-BIN1-300-002.fit
B:
Calibrated-T27-NGC1232-20140929-035849-Blue-BIN1-300-001.fit
Calibrated-T27-NGC1232-20140929-040416-Blue-BIN1-300-002.fit
- First, we must combine the two exposures in each filter. To do this, open the "Batch" menu in Nebulosity and select "Align and Combine Images."
- Under "Output mode," select "Save stack" - this will ensure that the merged exposures are saved as a single image.
- Under "Alignment method," select "Translation + Rotation + Scale".
- Leave the rest of the options as the defaults.
- Select the two exposures in the R filter.
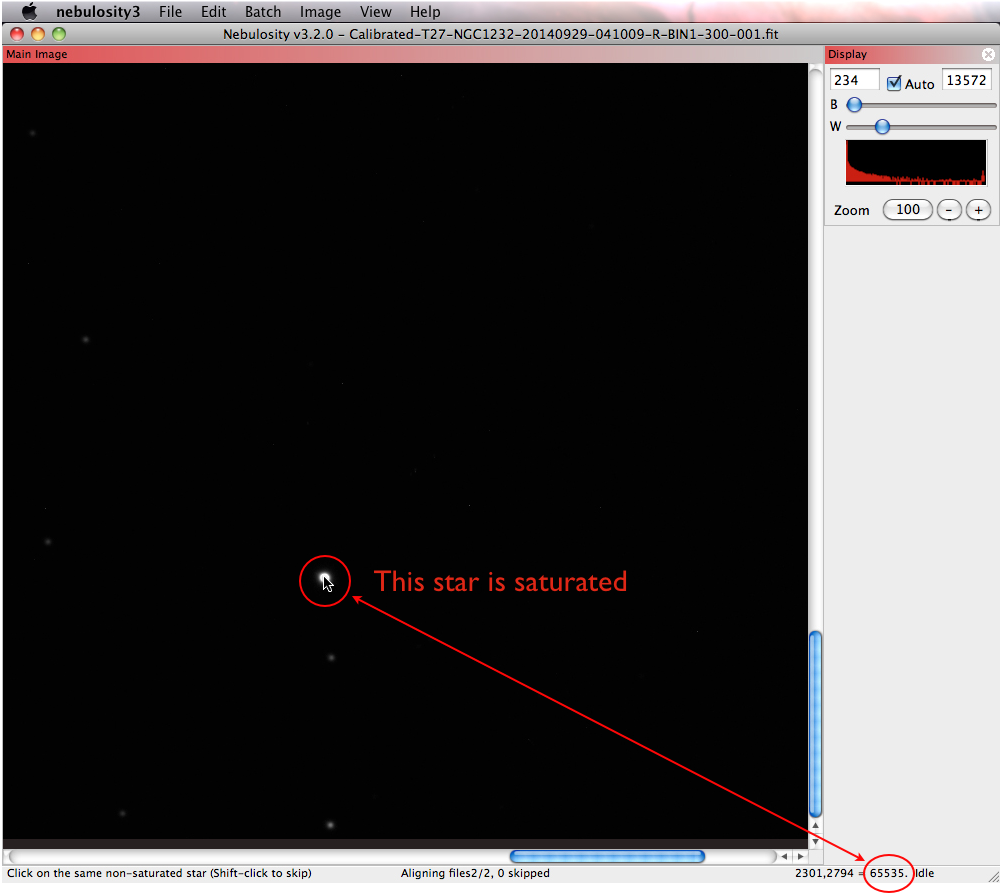
- The menu at the bottom left of the Nebulosity window will say "Click on the same non-saturated star (Shift-click to skip)".
- Find a star in your image and hover your mouse over it. A value of 65,535 in the lower right corner indicates that the star is saturated. Try to pick a star that has a value lower than this.
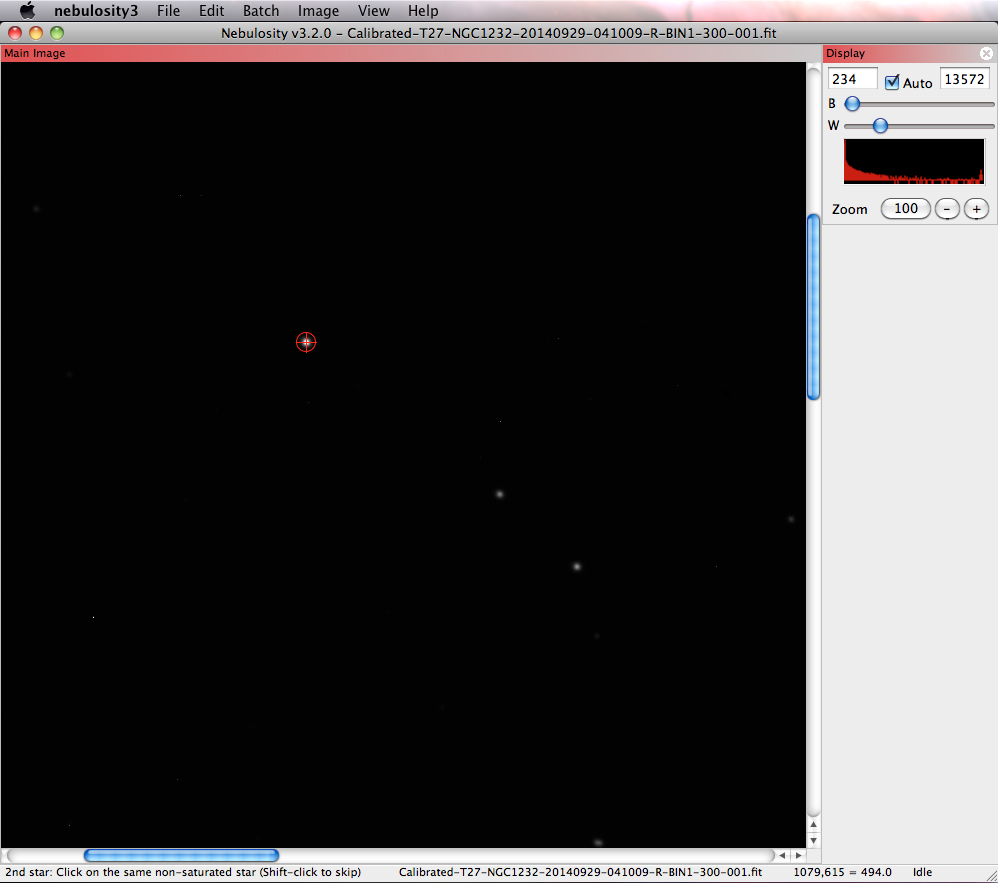
- Once you have found a suitable non-saturated star, click on it. A red circle will appear around the star. Click on the same star when indicated by the menu at the bottom of Nebulosity.
- Next, find a second star. You can achieve better accuracy by selecting a star that is far away from the first star you selected. You can scroll within your image, or zoom out if necessary. Click on this second star in the second frame when indicated by the menu at the bottom.
- You will now be prompted to save your aligned and combined image. Give it a suitable name. Here we chose the following filename:
NGC1232_R_stack.fit
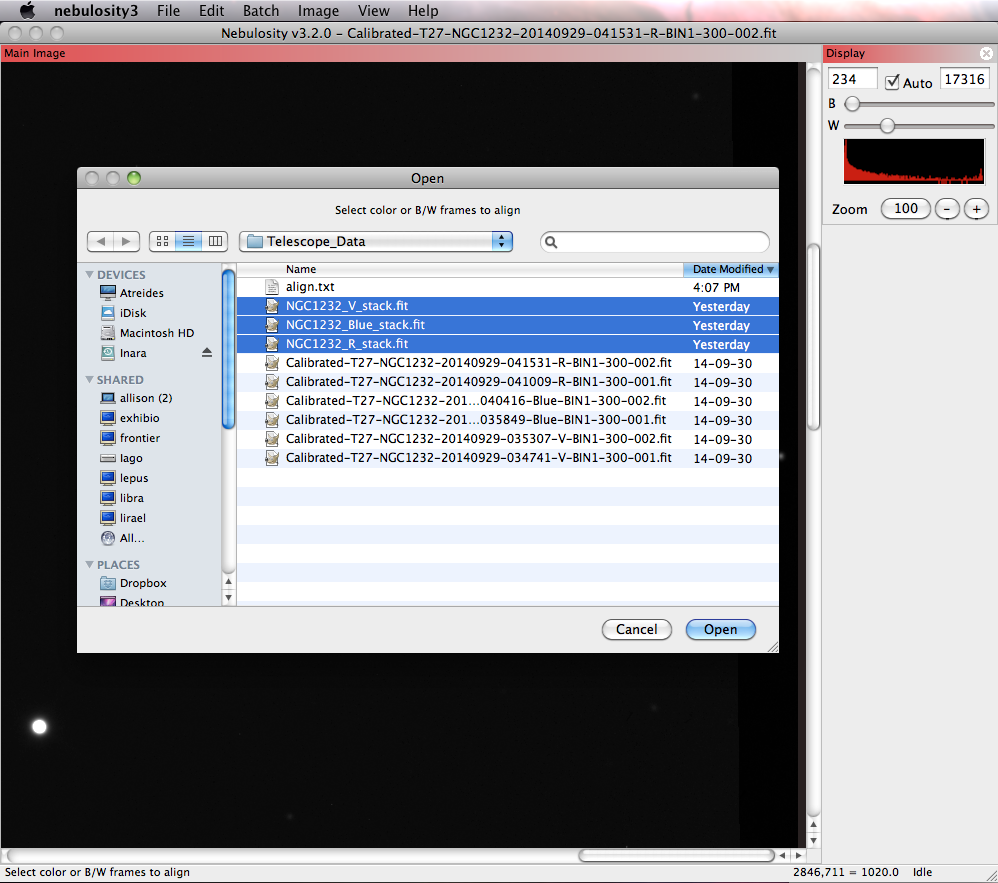
- Repeat the steps above for the other filters (in this case, V and B). We now have three stacked files:
NGC1232_R_stack.fit
NGC1232_V_stack.fit
NGC1232_Blue_stack.fit
Align Stacked Exposures
All of your individual filter exposures should be aligned and combined into stacked filters. Before you can combine them into a 3-colour image, you must align the stacked filter frames to each other. If you do not do this, Nebulosity will give you an error when you try to combine them in the (L)RGB Synthesis mode.
The process for aligning your stacked exposures is very similar to the process of combining them.
- Go to Batch -> Align and Combine Images.
- Under "Output mode," select "Save each file." You still want the individual frames (you will be combining them later into a colour image), but you want them aligned in the same way.
- Under "Alignment method," select "Translation + Rotation + Scale".
- Leave the rest of the options as the defaults.
- Select your three stacked filter frames.
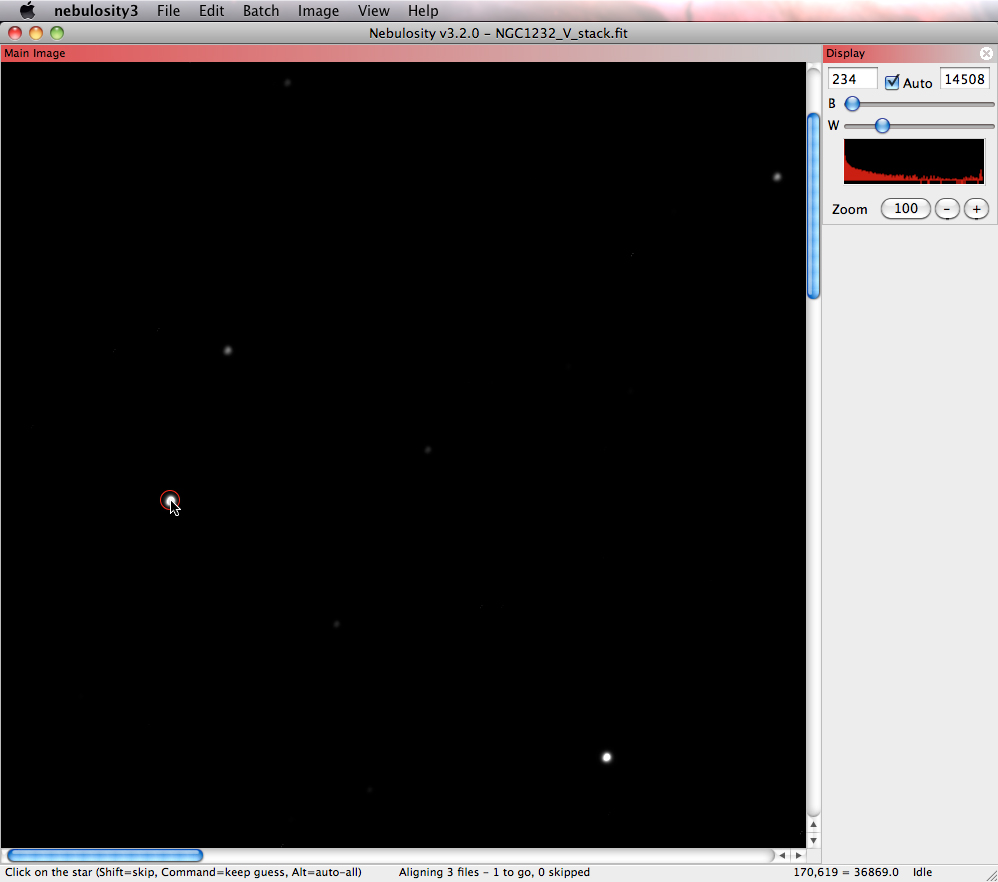
- Find a non-saturated star in your first frame and click on it. A red circle will appear around it. Nebulosity will bring up the second frame (it will likely look very similar). Click on the same star (it should be within the red circle, but it might not be). Repeat for the third frame. Once the red circle has a cross inside it, find a second star far away from the first one. Click on it and a green circle will appear around it. Click on the same star for the second and third frames.
- Nebulosity will NOT prompt you to name your saved files. They will be saved in your working directory, prefixed with "align_". We now have three aligned and stacked files:
align_NGC1232_R_stack.fit
align_NGC1232_V_stack.fit
align_NGC1232_Blue_stack.fit
Digital Development of Aligned Frames
Now that the three filters are aligned, you can start to bring out the details in your data. The basic idea is to enhance the features of your celestial object (galaxy, nebula, etc.), while maintaining a nice black background.
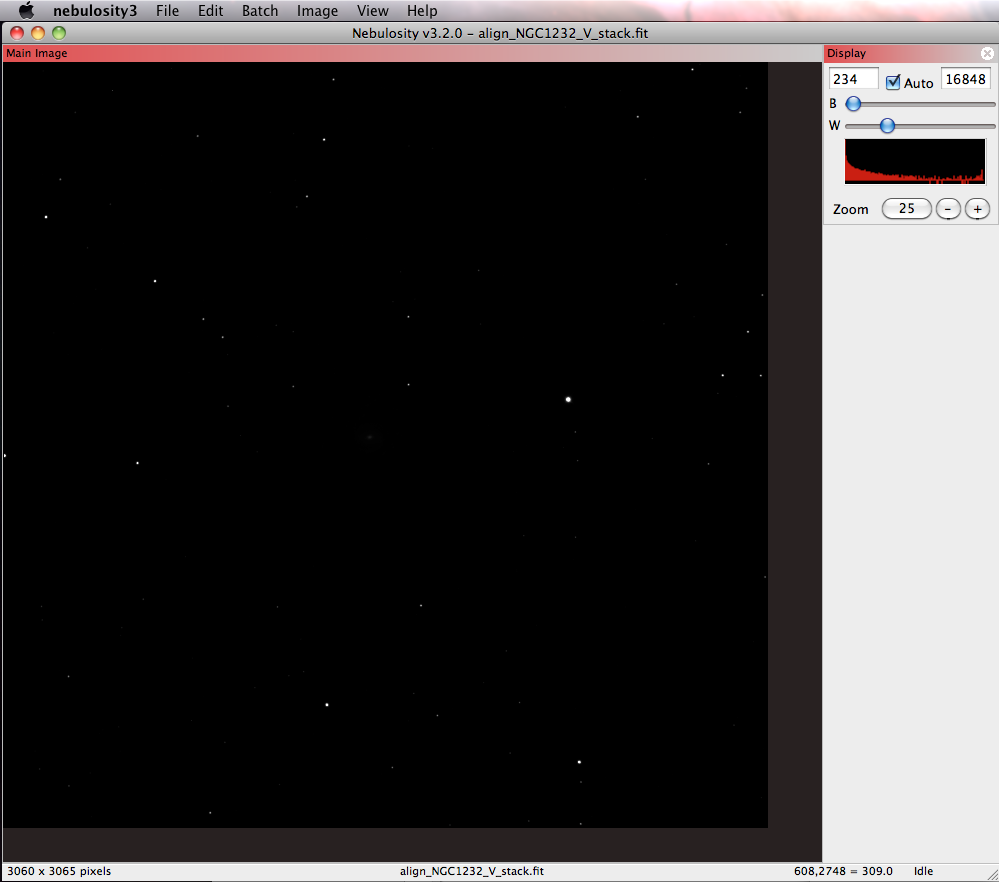
- Load one of the stacked and aligned frames in Nebulosity. Zoom out so that you can see the entire image.
align_NGC1232_V_stack.fit.
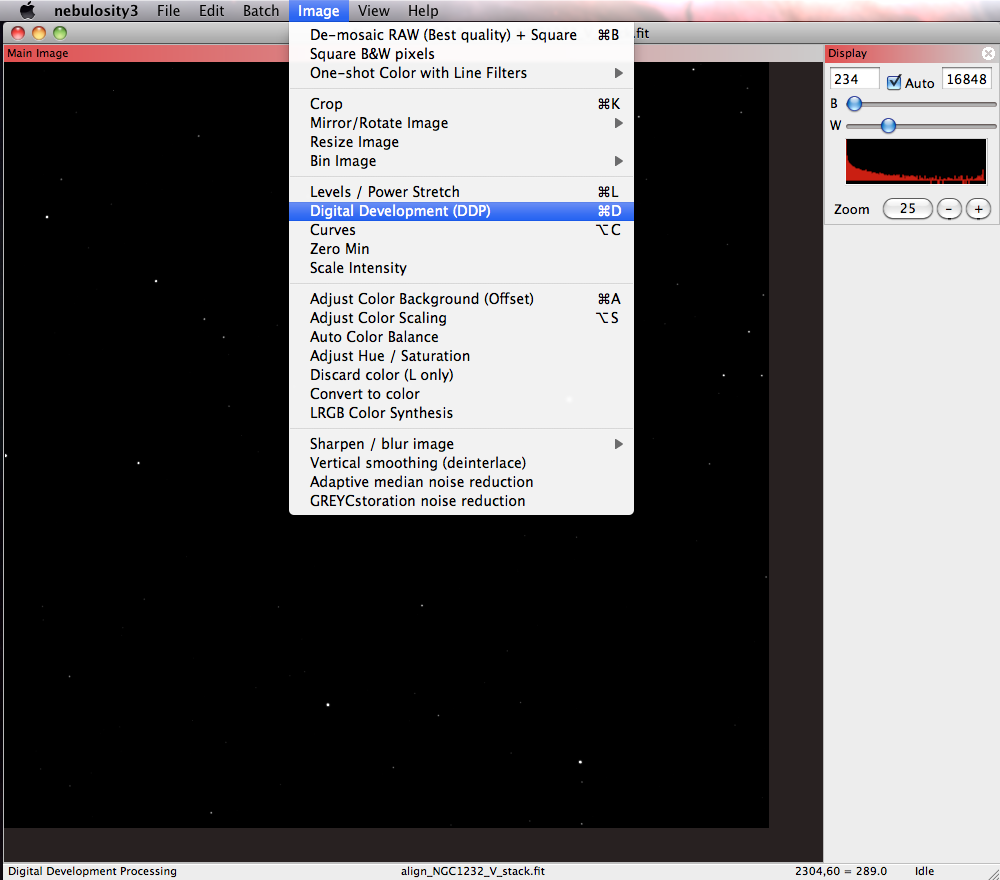
- There are several ways to bring out the detail in your image. A simple way is to use the "Digital Development" tool. In Nebulosity's menu select "Image", then "Digital Development".
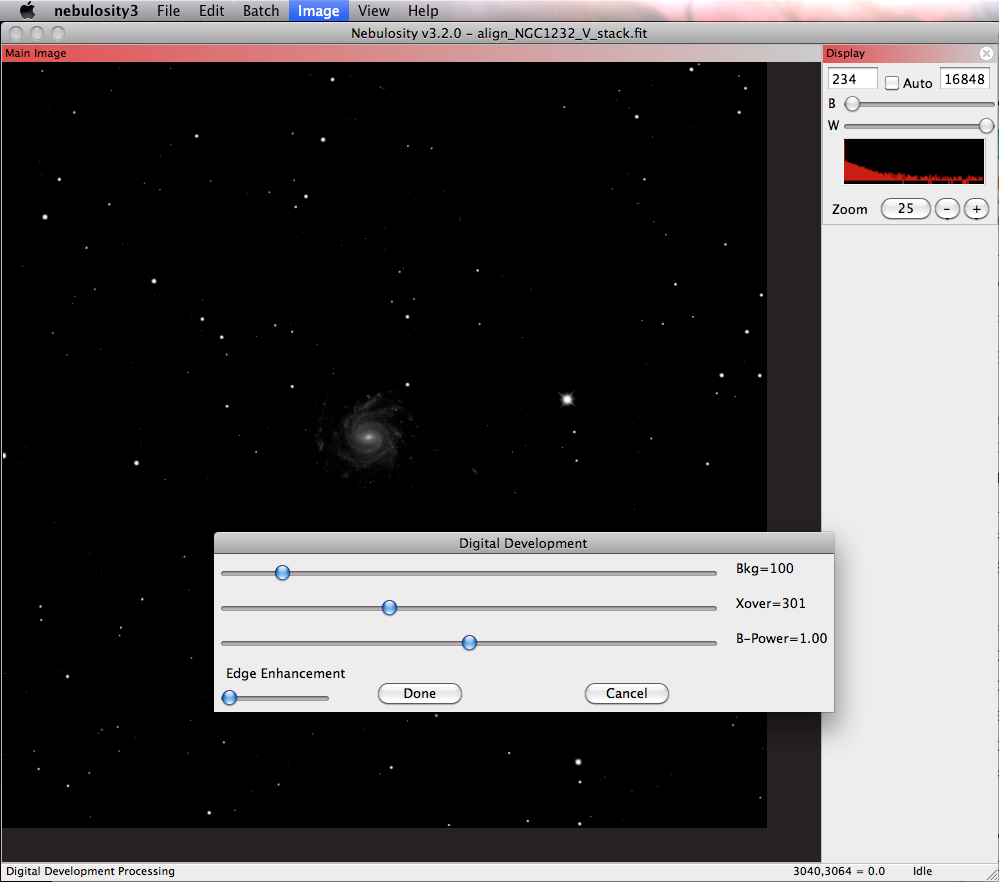
- The Digital Development tool will try to pick some defaults to automatically enhance your image. This screenshot shows the automatic settings for
align_NGC1232_V_stack.fit
.
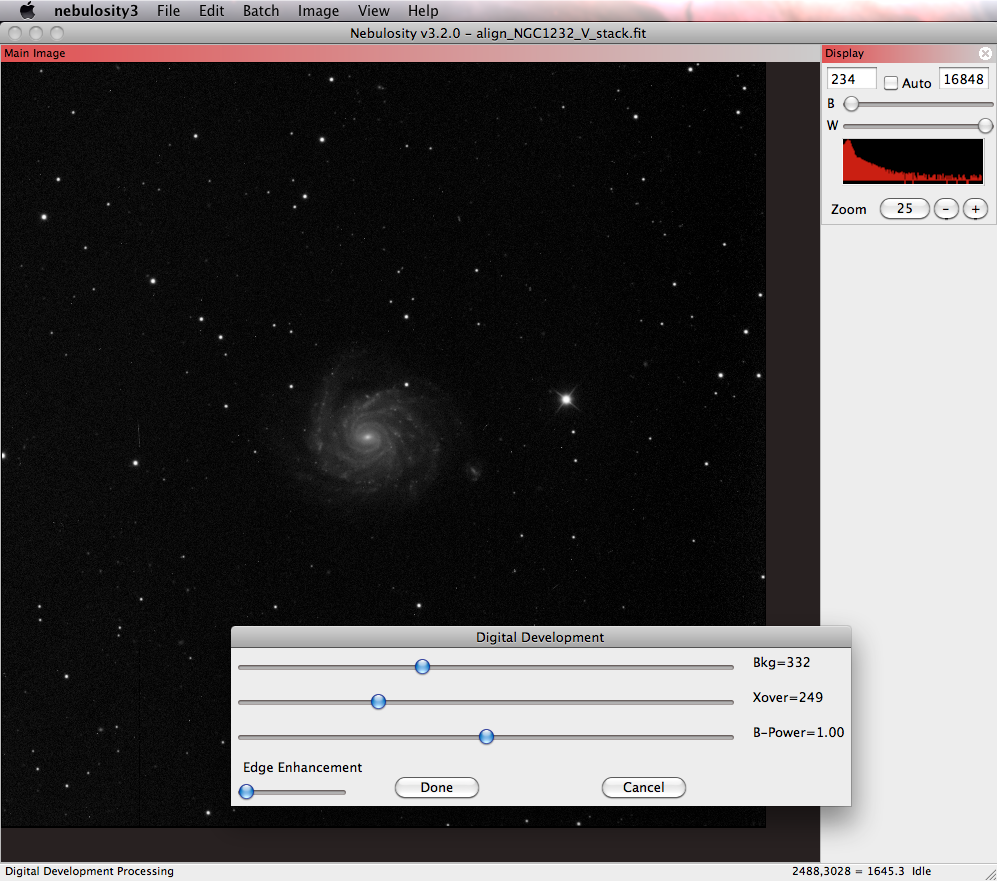
- You can adjust the sliders until you are satisfied with the image. You will notice that Xover and B-power will change your image the most. Xover will change the brightness and contrast in your image. Sliding it to the left will make your image brighter, but if you slide it too far, you may wash your image out. B-Power and Bkg control the background darkening. You can adjust the sliders until the preview shows you a bright object with a dark background. When you are done, click "Done" and your changes will be applied. Here, we have the selected following settings: Bkg=332, Xover=249, B-Power=1.00. Remember to note the values you have selected for each slider, in case you need to replicate your results. (You may also use the "History" function to review before you close Nebulosity.)
- Save your newly developed file. We save this file as
dev_align_NGC1232_V_stack.fit</dev>.
- Repeat the procedure for the rest of your files.
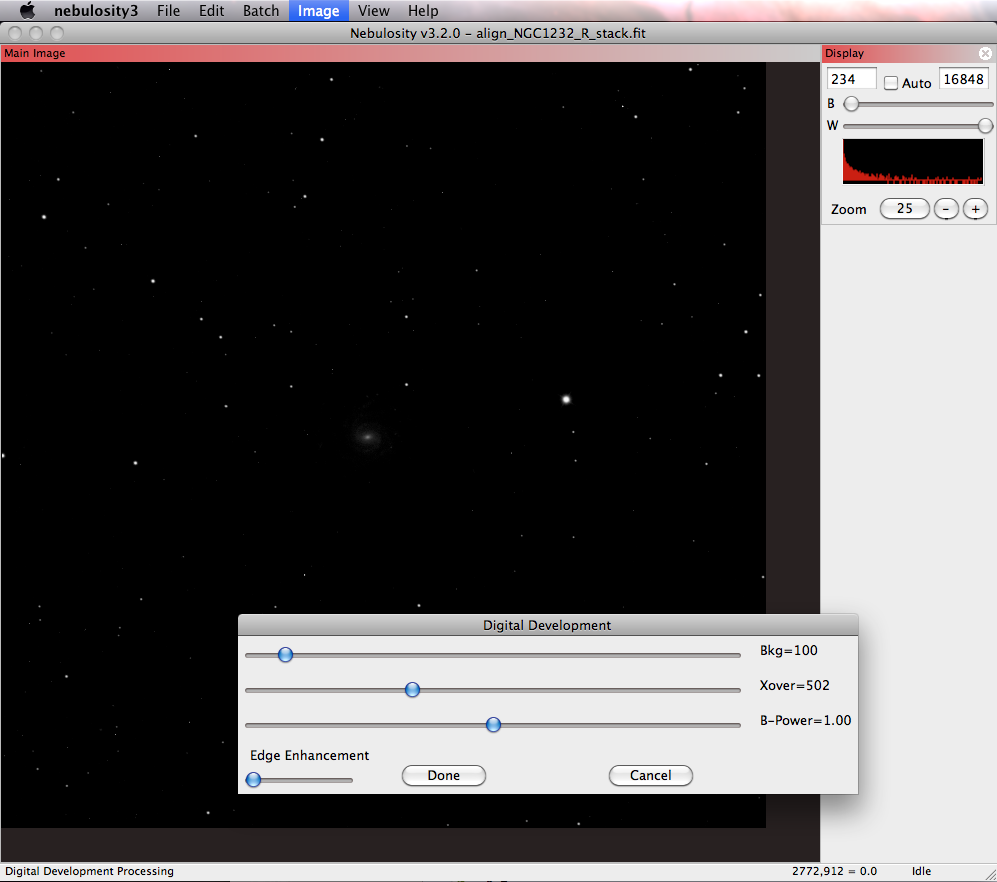
- Here is the default Digital Development for <pre>align_NGC1232_R_stack.fit:
- We adjust the settings to help further bring out the details in the galaxy. Note that this red exposure is very faint. Even after adjusting, it is difficult to bring out many details in the image.
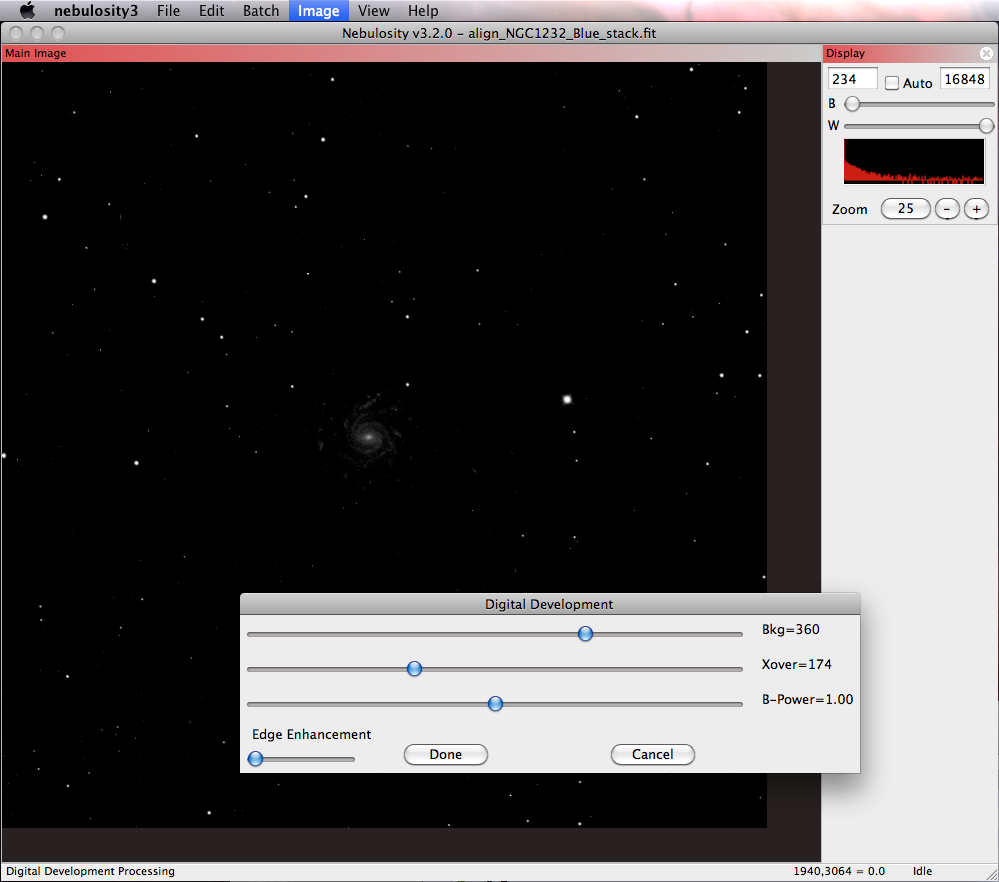
- Here is the default Digital Development for
align_NGC1232_Blue_stack.fit
:
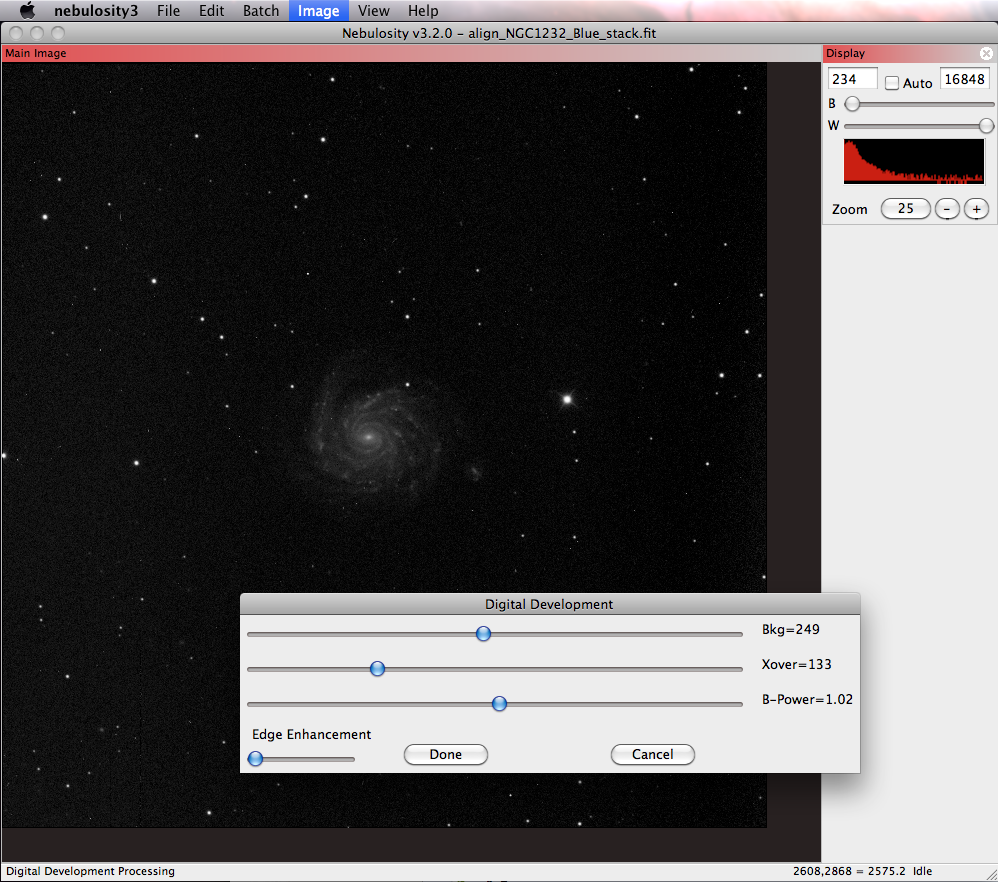
- After adjusting to bring out the details:
- We now have three developed files that we can use to create 3-colour images:
dev_align_NGC1232_R_stack.fit
dev_align_NGC1232_V_stack.fit
dev_align_NGC1232_Blue_stack.fit
Creating 3-Colour Images
If you are working with your own telescope data, you may need to pre-process your data for optimal 3-colour image results.
If the red, green, and blue frames that you are combining have already been pre-processed, follow the steps below to create your 3-colour image:
- Open the Image menu, then select LRGB Color Synthesis.
- The simplest mode is RGB. Use this if you have three colour frames, but do not have a luminance frame.
- If you do have a luminance frame, use LRGB: Color Ratio mode.
- Click on the "Red frame" button to load your red filter frame.
- Repeat with "Green frame" and "Blue frame".
- If you have a luminance frame, click on "Luminance frame" to load it.
- Click "Apply." You should see your combined (L)RGB image in the main window. Use the "Zoom" buttons on the right-hand menu to adjust the frame so that you can see your object of interest. Your image will likely not look the way you want it to yet. There is a good chance that it may be too green, for example.
- Use the sliders to adjust the relative amount colour in each of the filters. Sliding the "Green" slider from 100 to 75, for example, will decrease the amount of green in your image. Click "Apply" to see how increasing or decreasing the slider affects your frame. It is a good idea to adjust just one filter at a time.
- Once you are satisfied with the colours in your image, click "Apply" and then "OK."
IMPORTANT: Once you have clicked "OK", you CANNOT use the sliders to adjust the relative amounts of each colour. You may therefore wish to record what the values on each slider were in case you wish to recreate your image later.


